Many users overlook the fact that a simple electrical fault can prevent an air compressor from starting, even if it appears everything is connected properly. Understanding the underlying electrical and mechanical components involved is essential to diagnosing the issue effectively. We’ll explore common causes, from circuit overloads to faulty pressure switches, and outline precise steps to identify and resolve these problems. Staying informed can save time and extend your compressor’s lifespan—so let’s examine what might be going wrong.
Key Takeaways
- Check and clean or replace the air filter to ensure proper airflow and prevent overheating.
- Inspect electrical connections, circuit breakers, and power supply for surges or faults.
- Verify safety devices like pressure switches and valves are functioning correctly.
- Inspect motor windings and capacitors for damage or failure, replacing if necessary.
- Perform routine maintenance, including lubrication and cleaning, to prevent mechanical and electrical issues.
Why Won’t My Air Compressor Start? Common Causes Explained
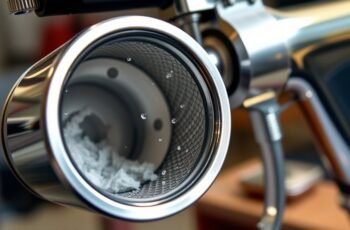
Have you ever wondered why your air compressor refuses to start? One common cause is a clogged air filter, which restricts airflow and prevents proper operation. Regularly inspecting and replacing the air filter guarantees ideal airflow and prevents strain on the motor. Another critical factor is the oil level; low or dirty oil can impair compressor function and cause overheating. Maintaining the correct oil level and changing the oil as recommended by the manufacturer keeps internal components lubricated and reduces mechanical failure risks. Additionally, debris or dirt buildup in the air filter can cause the compressor to overheat or fail to start. Addressing these issues promptly helps guarantee reliable startup and prolongs the lifespan of your air compressor.
Checking the Power Supply and Circuit Breaker Conditions
When troubleshooting an air compressor that won’t start, verifying the power supply and circuit breaker status is essential. First, check for signs of a power surge, which can cause electrical components to trip or fail. Power surges often result from lightning strikes or sudden electrical faults, disrupting normal operation. Next, inspect the circuit breaker; a circuit overload caused by excessive current draw can trip the breaker, cutting power to the compressor. Reset the breaker if necessary, but ensure that underlying causes, like a jammed motor or faulty wiring, are addressed to prevent repeated trips. Confirm that the compressor is receiving consistent voltage; fluctuations can hinder startup. Properly diagnosing and resolving issues in the power supply and circuit breaker conditions is critical for reliable compressor operation.
Inspecting the Pressure Switch and Safety Valves for Proper Function
We will now verify that the pressure switch is correctly set and responds appropriately to pressure changes. Next, we will test the safety valves to guarantee they release at the correct pressure thresholds. Proper operation of these components is essential to prevent pressure-related malfunctions and ensure safe compressor startup.
Checking Switch Settings
Ensuring the pressure switch and safety valves are functioning correctly is essential for diagnosing a compressor that won’t start. We should verify that the switch’s settings match the manufacturer’s specifications, especially the cut-in and cut-out pressures, which directly impact operation. Additionally, check the air filter; a clogged filter can cause pressure buildup issues, preventing the switch from activating. Confirm the oil level, as low oil can affect switch performance and safety valve operation.
Key steps include:
- Adjust the pressure switch to proper settings, ensuring it responds accurately to pressure changes.
- Inspect the safety valve for proper seating and responsiveness.
- Verify that the air filter is clean and the oil level is adequate for *ideal* pressure switch function.
Testing Safety Valve Operation
How can we verify that the safety valve and pressure switch are functioning correctly? Proper testing involves following safety procedures and precise valve troubleshooting steps. First, ensure the compressor is unplugged, then manually release pressure to prevent accidents. Next, operate the pressure switch to observe if it activates at the designated cut-in and cut-out pressures. For the safety valve, apply a controlled pressure increase using a hand pump or pressure source. If the valve opens at the specified pressure, it’s functioning correctly; if not, replacement is necessary.
| Step | Action | Expected Result |
|---|---|---|
| 1 | Disconnect power | Safe to inspect |
| 2 | Manually pressurize | Valve opens at set pressure |
| 3 | Observe pressure switch | Switch activates at correct pressure |
| 4 | Release pressure | Valve reseats properly |
| 5 | Confirm operation | All components respond as designed |
Examining the Motor and Capacitor for Wear or Damage
We start by inspecting the motor windings for signs of wear, such as discoloration, cracks, or burnt areas, which can indicate overheating or electrical failure. Next, we test the capacitor’s functionality using a multimeter to make certain it maintains the correct capacitance value. Identifying any damage or malfunction here is vital to restoring proper motor operation.
Inspect Motor Windings
To accurately diagnose motor issues, it’s essential to examine the motor windings for signs of wear or damage, as these can prevent the compressor from starting properly. We focus on inspecting the motor winding for visible signs of overheating, corrosion, or burn marks. Conducting insulation testing is vital to evaluate the integrity of the winding insulation, ensuring there are no shorts or breakdowns.
Key points to consider:
- Use a multimeter to perform insulation resistance testing, confirming the insulation’s health.
- Look for broken or frayed windings, which indicate physical damage.
- Check for unusual resistance readings that suggest internal faults, preventing proper motor operation.
Accurate inspection of the motor windings helps identify potential electrical or mechanical failures early.
Test Capacitor Function
After inspecting the motor windings, the next step is to evaluate the capacitor’s condition, as a faulty capacitor can prevent the compressor from starting. We test the capacitor by checking for proper capacitance and visual signs of wear or damage. A capacitor’s lifespan typically ranges between 8 to 10 years, but electrical insulation degradation can occur earlier, leading to failure. To accurately assess it, we use a multimeter with a capacitance setting.
| Test Step | Indicator of Fault |
|---|---|
| Visual inspection | Bulging, leaks, or corrosion indicate damage |
| Capacitance measurement | Values outside rated tolerance suggest failure |
| Check for electrical insulation | Compromised insulation can cause short circuits |
| Resistance testing | Very low or infinite resistance signifies internal faults |
| Physical wear | Cracks or burns indicate deterioration |
How to Test and Replace Faulty Components Safely
Before testing and replacing faulty components in your air compressor, it’s essential to guarantee safety by disconnecting the unit from power and wearing appropriate protective gear. Proper testing involves inspecting components like pressure switches, relays, and wiring for signs of damage or wear. When handling these parts, consider lubrication techniques to prevent future issues and account for environmental factors that may accelerate component deterioration.
Key steps include:
- Use multimeters to check electrical continuity and voltage levels.
- Visually inspect components for corrosion, burns, or physical damage.
- Replace faulty parts with compatible, high-quality replacements, ensuring proper installation.
Always verify that the compressor is clean and free of debris before testing, as environmental factors can influence component performance.
Tips to Prevent Future Starting Issues With Your Air Compressor
Regular maintenance and proactive measures can markedly reduce the likelihood of future starting issues with your air compressor. Implementing consistent maintenance routines guarantees critical components like pressure switches, electrical connections, and valves remain operational, preventing malfunction. Regularly inspecting and cleaning filters and cooling systems minimizes buildup that can hinder startup. Storage tips are equally essential; store the compressor in a dry, temperature-controlled environment to prevent moisture accumulation and corrosion. Disconnect power sources during extended inactivity to avoid electrical issues and protect against dust and debris. Additionally, lubricate moving parts as specified in the manufacturer’s guidelines to maintain smooth operation. By adhering to these practices, you can enhance reliability, reduce downtime, and extend the lifespan of your air compressor.
Frequently Asked Questions
Can Temperature Affect My Air Compressor’s Starting Ability?
Temperature effects greatly influence compressor performance; extreme cold can cause thickened oils and stiff components, hindering startup, while high temperatures may lead to overheating. Proper temperature management guarantees reliable compressor operation and avoids startup issues.
Is It Safe to Start Troubleshooting Without Unplugging the Unit?
We advise against troubleshooting without unplugging the unit, as electrical safety is paramount; working directly on the power source risks shock. Always disconnect the compressor first to guarantee safe, effective diagnostics and prevent damage or injury.
How Often Should I Perform Maintenance to Avoid Starting Problems?
We suggest inspecting the air filter and checking the oil level monthly, especially if used frequently. Regular maintenance guarantees ideal airflow and lubrication, preventing starting issues caused by clogged filters or low oil, consequently maintaining compressor reliability.
Are There Specific Brands More Prone to Starting Issues?
Some brands are notoriously more prone to starting issues due to questionable reliability and compromised compressor longevity. We’ve observed that lesser-known brands often sacrifice quality, risking frequent malfunctions, whereas trusted brands maintain consistent performance, ensuring superior reliability and extended compressor longevity.
What Are the Signs of a Failing Pressure Switch?
We observe pressure switch malfunction signs like inconsistent pressure regulation and frequent cycling, often caused by electrical connection issues. These symptoms indicate a failing pressure switch, requiring careful inspection of electrical contacts and potential replacement to guarantee proper compressor operation.
Conclusion
Just as a skilled conductor guarantees each instrument plays in harmony, thorough inspection and maintenance keep our air compressors running smoothly. Addressing electrical, mechanical, and safety components methodically prevents unexpected failures, much like tuning an engine before a race. With vigilant care and timely repairs, we can extend our compressor’s lifespan and guarantee reliable performance. In the end, proactive attention transforms a potential breakdown into a symphony of efficiency and reliability.